The Academy kit no. 1323, labeled M151A1 Light Utility Truck, in 1:35 scale looked, at the moment of its release like a very good opportunity for the modellers who wanted to build a model of the M151, and their only option before was the old Tamiya kit with its roots deep in the eighties, and the copies thereof (also released by Academy). The Tamiya kit depicted the A2 variant of the truck, and the detail level of it also left a lot to be desired.
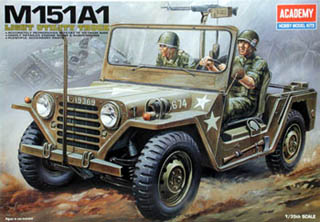
The new Academy kit made a good impression already after opening the box: apart of the frames it also contains separately cast body and also seven vinyl tires. The detail level is good. The model contains detailed engine compartment, radio kit and pedestal mounted M60 machine gun. The front fenders are shaped like in the A1 variant, as are most other details, just the shape of the rear fenders (rear portion) looks like the A2 variant. Model made "out of the box" would look OK, the parts' fit is also good.
I started to build the model shortly after the Academy kit was released. For one, I wanted the "new quality" of the kit, on the other hand I got my hands on the Technical Manual drawing, showing the undercarriage of an early MUTT:
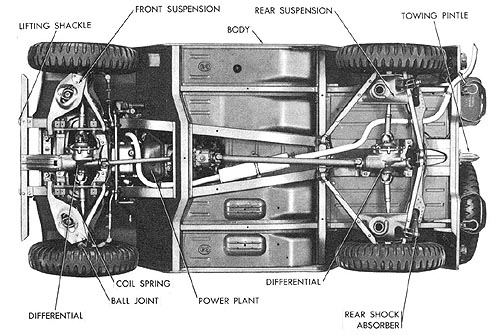
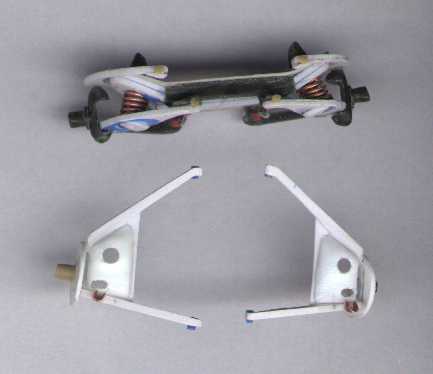
This picture solved one of my important problems of correctly reproducing the rear suspension of the truck, so important to its faith. And neither the old Tamiya kit, nor the new Academy didn't do it right - Academy repeated the errors of the Tamiya kits on the undercarriage and both models try to come close to the A2 variant, moreover the space on the rear portion of the undercarriage is dramatically empty. Because of this, using fotos from The Net I recreated the structure of the lower body: The body rails in their central portion, front and rear crossmember and the rest of the sheet metal. The scope of the work done can be seen on the picture below:
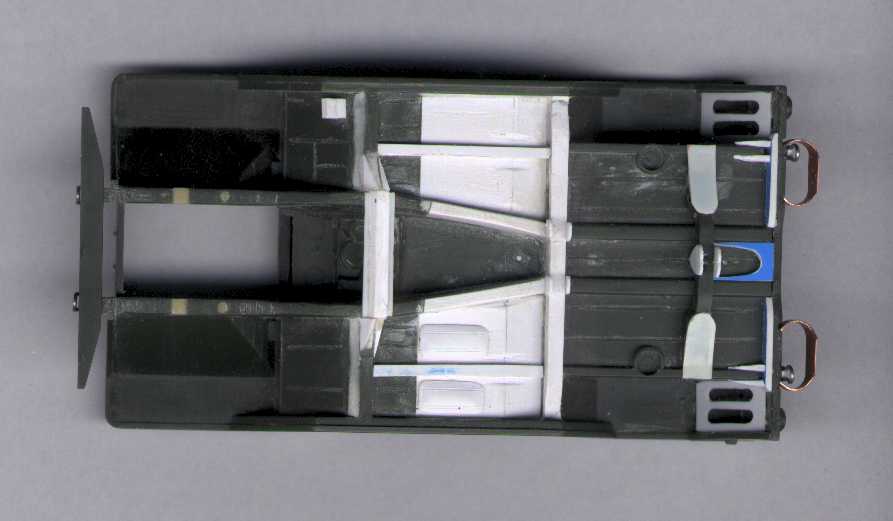
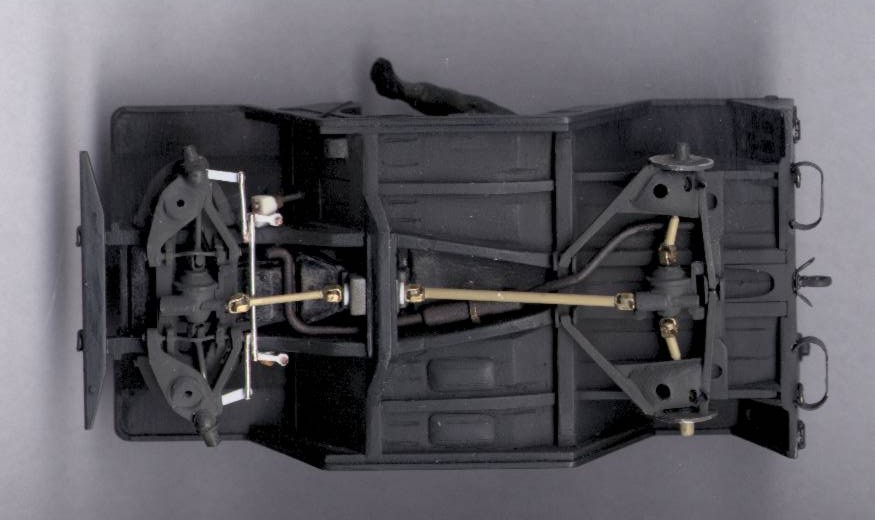
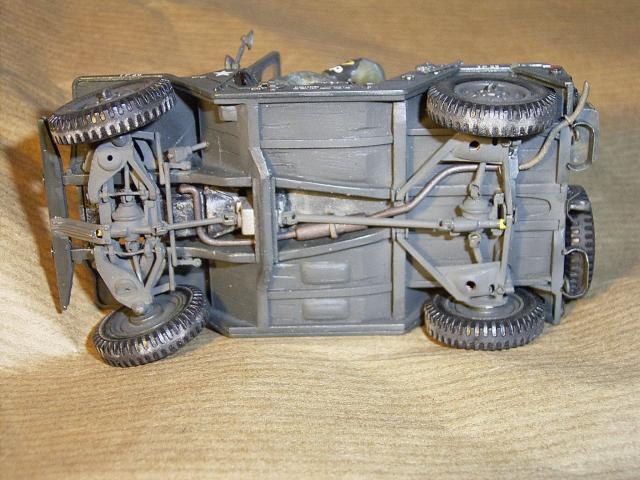
As can be seen, if the undercarriage is important for the modeller, he has a lot of work to do on this model. It was sure important for me, as it was influential on the history of the vehicle, so I went on with scratchbuilding the rear A-arms, which is the most out-of-place part of the kit, as it shows something similar to the A2 variant. After analyzing the fotos I also went on and rebuilt the front suspension, to correct the simplifications of the kit.
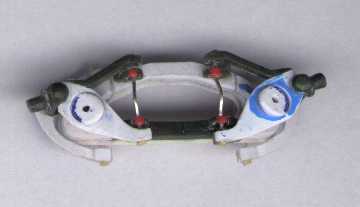
Next were the differentials, U-joints, and shafts. Additionally I changed the shape of the rear fenders in the place where they meet with the rear body panel and added the stiffening brace inside the rear wheel well. Also I scratchbuilt the steering gearcase and the levers and rods which work with it. After putting it all together it looked like on the picture below:
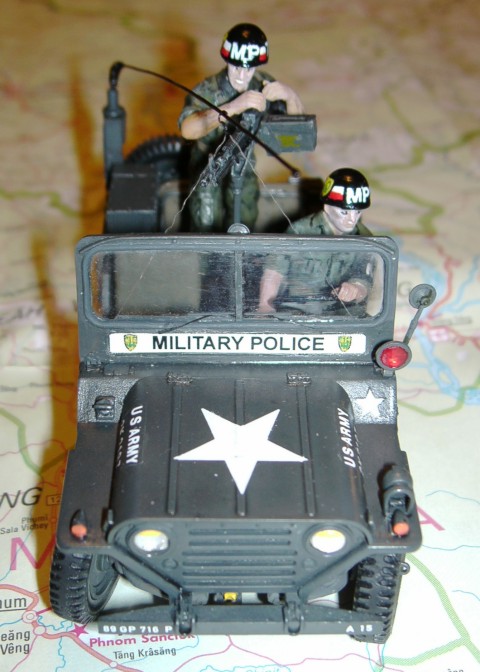
The topside was easier to build, but still gave the modeller a chance to do some extra work. I built a new steering wheel, seat frames and cushions and machine gun mount. I also missed the part seen on many fotos - the bench seat, so I scratchbuilt one, alas in a folded position, to allow for more room for the machine gunner. The figures were fitted to this - the Driver comes from the older Academy kit, the M151A2 with trailer, and the gunner comes from the Dragon Green Berets kit, both after heavy surgery. I also used the Eduard 35496 photoetched details kit to enhance the radio, the machine gun, the engine and other parts of the model. You have to be careful though, when building a Vietnam version of the MUTT using this photoetched kit, as it contains many parts not typical to Vietnam, like those little rectangular reflectors typical for today's US Army vehicles in Germany.
I decided to paint my MUTT to depict a Military Police "cruiser", which also had to take the crew into consideration. The markings of Military Police vehicles is regulated by an according Technical Bulletin, which calls for two white tables with the inscription "Military Police" on the vehicle, which I made using a laser printer, and then completed painting freehand the badge of the 18th MP brigade, responsible for the Republic of Vietnam. "White letters" come from the dry decal sheets from "Seno" (1,5 mm) and classic decals from "TL Decals" (1 mm), both companies from Germany. The most visible element of the crew, are the helmets - traditional steel pots worn without liners and painted gloss black. At their front there are white, 3-inch "MP" letters. The white-red band indicates the service under Army level headquarters. Red band would be brigade- or division-level, and blue-red band would be division level. Interestingly the helmets were non-symmetrical - on their left side was the company designation: "716", on their right side the badge of the 18th MP brigade. Both MPs also have the arm-bands, called brassards with white MP letters and 18th MP brigade badge.
Also mounted on the "cruiser" is the red light lamp, made out of BB gun pellet with clear foil lens, and the radio antenna tied down to allow driving the truck.